Understanding Tevo Tarantula Pro Settings
The Tevo Tarantula Pro is a popular 3D printer known for its affordability and open-source design, making it a favorite among hobbyists and enthusiasts. However, to achieve high-quality prints, understanding and properly configuring its settings is crucial. This guide dives deep into the key settings, slicer software configurations, and troubleshooting tips to help you optimize your Tevo Tarantula Pro for exceptional results. From bed leveling to filament selection, we will cover everything you need to know to unlock the full potential of your printer. Fine-tuning these settings is an iterative process, but with patience and the right knowledge, you can significantly improve your print quality, reduce failures, and enjoy a more rewarding 3D printing experience. The goal is to move beyond the basic setup and truly master your machine.
Key Settings to Adjust
Several key settings directly impact the quality and success of your prints. These settings need to be adjusted based on the filament you are using and the specific object you are printing. By understanding how these settings work, you can easily make adjustments to obtain the best print results possible. Getting a good grasp of these settings can save you a lot of time and frustration. Proper calibration and adjustments are essential steps to take before starting any prints.
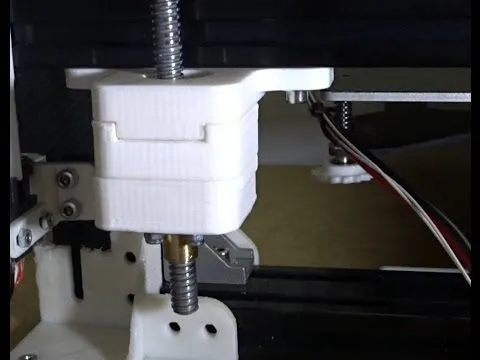
Bed Leveling Calibration

Bed leveling is the foundation of a successful print. An uneven bed can cause the first layer to not adhere properly, leading to warping, poor layer adhesion, and failed prints. The Tevo Tarantula Pro typically uses a manual bed leveling system, which requires careful adjustment of the bed screws. Start by preheating the bed to the recommended temperature for your filament. Then, use a piece of paper to gauge the distance between the nozzle and the bed at each corner. The paper should offer slight resistance when you slide it between the nozzle and the bed. Repeat this process until the nozzle height is consistent across the entire bed surface. This process can be tedious, but a well-leveled bed is vital for reliable prints. Consider upgrading to an auto-leveling sensor for convenience.
Nozzle Temperature Settings
The nozzle temperature is critical for melting the filament and achieving proper layer adhesion. The ideal temperature varies depending on the filament type. PLA (Polylactic Acid) typically prints well between 190°C and 220°C, while ABS (Acrylonitrile Butadiene Styrene) usually requires temperatures between 230°C and 250°C. Check the filament manufacturer’s recommendations for optimal printing temperatures. If the temperature is too low, the filament won’t melt properly, leading to under-extrusion and weak prints. If the temperature is too high, the filament may overheat, causing stringing, oozing, and a loss of detail. Fine-tuning the nozzle temperature through small increments will help you find the sweet spot for your chosen filament and print settings.
Print Speed Optimization
Print speed directly impacts the print time and quality. Faster speeds reduce print time but can lead to lower print quality if not managed properly. Slower speeds generally result in better print quality, but also increase print time. For the Tevo Tarantula Pro, a good starting point for print speed is around 50-60 mm/s for general printing with PLA. For finer details or more complex prints, you may want to reduce the speed to 30-40 mm/s. For ABS, slower speeds are often necessary to mitigate warping. Experiment with different speeds while monitoring the print quality. Observe how the layers adhere to each other and how well the details are reproduced to find the optimal balance between speed and quality. You can adjust print speed in your slicer settings.
Extrusion Settings

Proper extrusion ensures that the right amount of filament is being delivered to the nozzle. Under-extrusion results in gaps between layers and weak prints, while over-extrusion can lead to blobs and imperfections. The extrusion multiplier, also known as the flow rate, controls the amount of filament extruded. You can calibrate the extrusion multiplier by measuring the actual amount of filament extruded for a specific distance. Then, calculate the appropriate adjustment and apply it in your slicer settings. Furthermore, make sure your extruder is properly calibrated. Check the e-steps in your printer’s firmware and adjust them if necessary. Proper extrusion is crucial for dimensional accuracy and overall print quality. Calibrating your extruder is very important to improve print results.
Slicer Software Configuration
Slicer software is the bridge between your 3D model and your 3D printer. It converts your model into a series of instructions (G-code) that the printer can understand. The settings within the slicer directly influence the print quality and success. Commonly used slicers with the Tevo Tarantula Pro include Cura and Simplify3D. It’s very important to select the proper slicer software.
Cura Configuration
Cura is a popular and free slicer known for its user-friendly interface and extensive settings options. When using Cura, you’ll need to configure settings such as layer height, print speed, temperature, support structures, and infill density. Start by selecting the Tevo Tarantula Pro profile within Cura. Then, adjust the settings based on the filament type and the complexity of the model. Pay close attention to the layer height; lower layer heights result in smoother surfaces but increase print time. Print speed and temperature settings, discussed earlier, also need to be adjusted. Cura offers a wide range of settings, allowing you to fine-tune your prints and experiment to obtain optimal results. Regularly update Cura to receive the latest features and improvements.
Simplify3D Configuration

Simplify3D is a paid slicer that offers advanced features and powerful customization options. It is known for producing high-quality prints and providing extensive control over the printing process. Simplify3D offers advanced settings for support structures, bridging, and layer customization. It can be a worthwhile investment for advanced users who want to push the limits of their printer. Its features are beneficial, but it comes with a higher price tag compared to free slicers. Setting up Simplify3D involves configuring machine settings, filament settings, and process settings. You will have more flexibility in creating intricate prints.
Optimizing Filament for Tevo Tarantula Pro
The choice of filament plays a significant role in print quality. Different filament types have different properties and require specific settings. The most commonly used filaments for 3D printing are PLA and ABS, both of which have their advantages and disadvantages. Understanding the characteristics of each filament is crucial for achieving optimal results. Filament quality also varies by brand, so it’s often worth experimenting with different brands to find the filament that works best for you.
PLA Filament Settings
PLA is a popular choice for beginners due to its ease of use and low printing temperatures. PLA is biodegradable and produces minimal odor while printing. Recommended settings include a nozzle temperature between 190°C and 220°C, a bed temperature of around 50-60°C (or even unheated), and a print speed of 50-60 mm/s. PLA is generally not prone to warping, so you can often print without a heated bed. Proper cooling is also important. Ensure that the part cooling fan is running at an adequate speed to prevent overheating and improve the print quality. However, it’s important to note that PLA can be brittle and less heat-resistant than other filaments.
ABS Filament Settings

ABS is a stronger and more heat-resistant filament compared to PLA. ABS prints require higher temperatures, typically between 230°C and 250°C for the nozzle and 80-110°C for the heated bed. Enclosing the printer can also help maintain a consistent temperature and reduce warping. Print speeds for ABS are generally slower, around 30-40 mm/s, to prevent warping and improve layer adhesion. Ensure proper ventilation to remove fumes. Although ABS offers superior mechanical properties, it tends to warp and contract as it cools, making it more challenging to print than PLA. A heated bed is essential for ABS printing, as is a well-enclosed print environment. It is an excellent choice if your finished product requires greater durability and heat resistance.
Troubleshooting Common Issues
Even with the right settings, you might encounter issues during the printing process. Troubleshooting is a part of the 3D printing experience. Here are some common problems and their solutions. Always pay attention to your prints and make adjustments as needed to achieve the best results. Learn to identify and resolve issues to master your printer and improve your skills.
First Layer Adhesion Problems
Poor first layer adhesion is a common issue, leading to prints detaching from the bed. Ensure that your bed is properly leveled. Clean the print bed with isopropyl alcohol to remove any oils or debris. Adjust the nozzle height to ensure the filament is being properly squished onto the bed. Using a brim or raft can also help with adhesion. A brim extends the base of the print, providing extra surface area for adhesion. A raft is a separate layer that the print sits on, which can help with warping and bed adhesion issues. Consider using a glue stick or painters tape for added adhesion, especially with difficult filaments like ABS.
Warping and Curling

Warping is the tendency of the print corners to lift off the bed, often caused by uneven cooling. Warping is particularly common with ABS. To minimize warping, use a heated bed, and ensure that the bed temperature is correct. Consider printing in an enclosure to maintain a consistent temperature. A brim or raft can also help prevent warping. Reduce the print speed for the first few layers to allow the filament to adhere better. Use the appropriate bed adhesion setting.
Stringing and Oozing
Stringing and oozing occur when small strands of filament appear between print features. This is usually caused by the filament oozing out of the nozzle while traveling. Increase the retraction distance and retraction speed in your slicer settings. Lowering the nozzle temperature can also help. Experiment with different retraction settings to find the optimal configuration. Clean any filament residue. Calibrating your printer is another key step to resolving these issues.
Achieving Optimal Print Quality
Achieving optimal print quality with your Tevo Tarantula Pro involves a combination of proper settings, careful calibration, and consistent maintenance. Regularly check and adjust your settings as needed, and don’t be afraid to experiment. The process of finding the right settings for different filaments and models is iterative. By understanding the key settings, the troubleshooting tips, and by consistently refining your approach, you can elevate your 3D printing projects. The more you print, the better you will become at tuning your printer. Enjoy the process of learning and creating!