What is the Tevo Tarantula Laser Cutter?
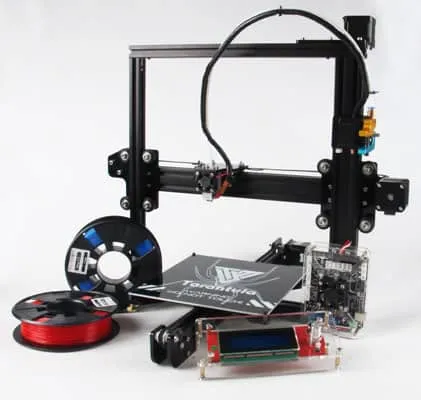
The Tevo Tarantula laser cutter is a versatile and affordable machine, often used by hobbyists and DIY enthusiasts. It’s a modification or an add-on to the original Tevo Tarantula 3D printer, allowing users to cut and engrave a variety of materials. This guide provides a comprehensive how-to on setting up, operating, and maintaining your Tevo Tarantula laser cutter. This machine opens up a world of possibilities for creating custom designs, intricate patterns, and personalized items. It can be a fantastic tool for both beginners looking to explore the potential of laser cutting and seasoned makers eager to expand their creative horizons. Understanding the basics of the Tevo Tarantula laser cutter is the first step to unlocking its full potential. This guide will take you through each step of the process.
Understanding the Components of Your Laser Cutter
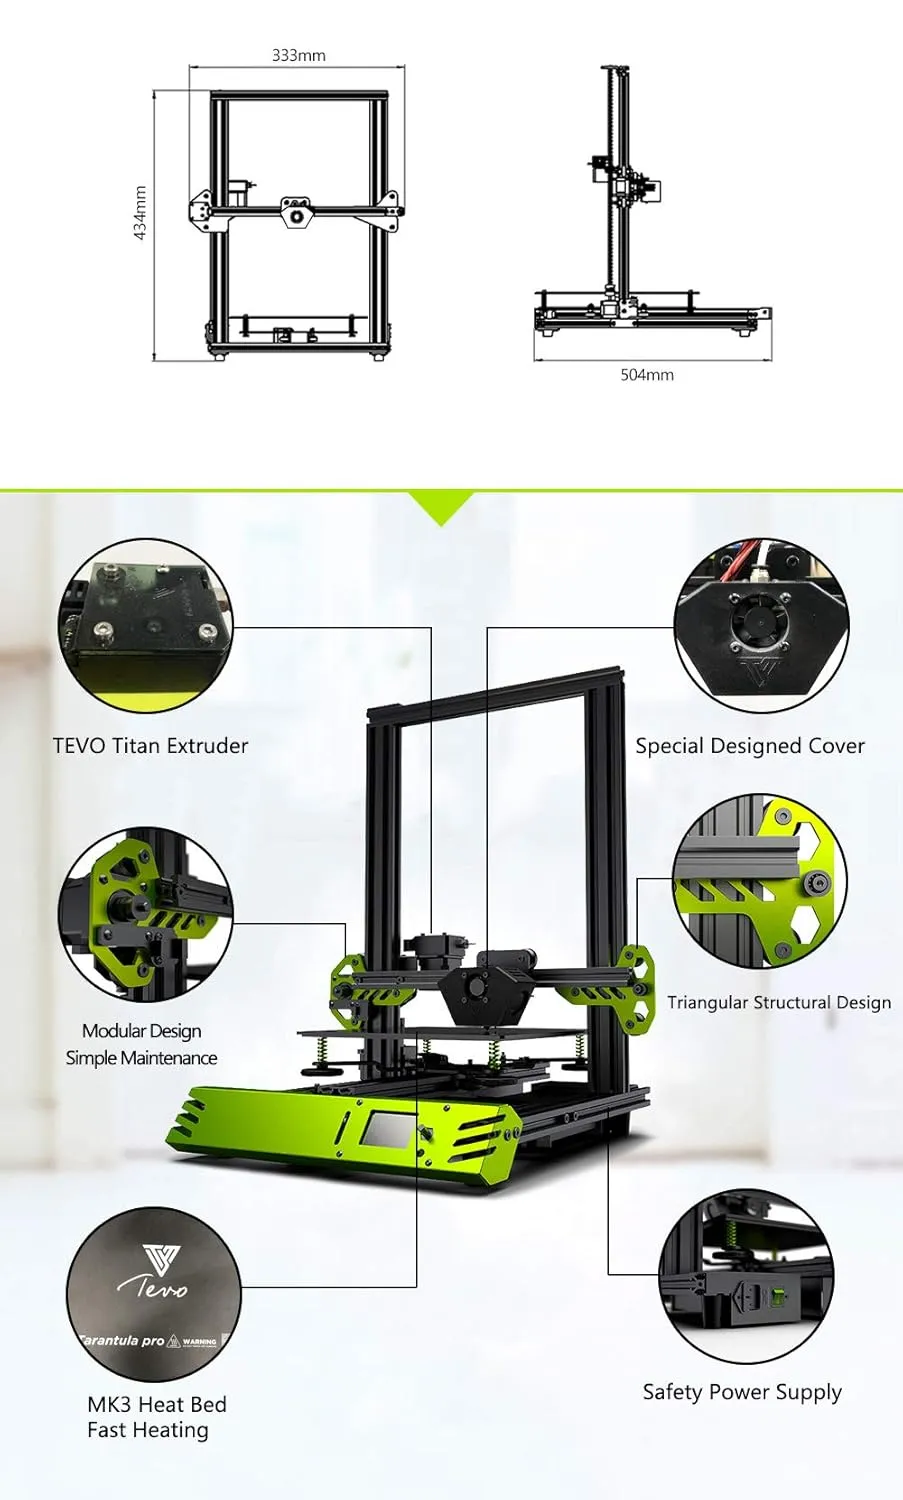
Before you begin, it’s essential to understand the different components of your Tevo Tarantula laser cutter. Knowing these parts and their functions will help you during assembly, operation, and troubleshooting. Familiarizing yourself with the components also ensures safe operation and helps in identifying potential issues early on. Let’s break down the core elements of your laser cutter, providing insights into their roles and importance.
The Laser Module

The laser module is the heart of the cutting and engraving process. It houses the laser diode, which emits a concentrated beam of light used to cut or mark materials. This module is usually mounted on the 3D printer’s existing frame, replacing the 3D printer’s extruder. The quality and power of the laser module significantly influence the machine’s cutting and engraving capabilities. Higher-powered modules allow for faster cutting speeds and the ability to cut through thicker materials. Proper maintenance of the laser module, including keeping the lens clean, is crucial for optimal performance and longevity. Always handle the laser module with care, and be mindful of the potential hazards associated with laser light.
The Control Board
The control board acts as the brain of your laser cutter, managing all operations, from powering the laser to controlling the movement of the laser module. This board receives instructions from the software (e.g., LaserGRBL) and translates them into actions. It controls the laser’s power output and the movement of the X and Y axes. The control board must be compatible with the laser module and the firmware installed on the 3D printer’s mainboard. Ensuring that the firmware is correctly configured for laser operation is essential for the machine to function properly. Always check the manufacturer’s specifications to confirm that all components are fully compatible and can be seamlessly integrated.
The Frame and Structure
The frame provides the structural support for the entire laser cutter. It’s often built from aluminum extrusions or similar materials, ensuring stability and precision. The frame needs to be sturdy to withstand the movement and vibrations generated during cutting and engraving. A stable frame ensures that your cuts are accurate and that the machine operates smoothly. Proper alignment of the frame components is crucial for achieving high-quality results. Regular checks for any loose screws or misalignments can help maintain the machine’s performance over time. Ensure the laser module is securely mounted on the frame to prevent movement during operation.
Setting Up Your Tevo Tarantula Laser Cutter

Setting up your Tevo Tarantula laser cutter involves several steps, from hardware assembly to software configuration. Following this guide carefully will ensure a smooth setup process, allowing you to start your laser cutting and engraving projects with confidence. Take your time, read all instructions thoroughly, and double-check your work as you go. Proper setup is the key to ensuring safe and effective use of your machine. Before you begin, gather all the necessary tools, which typically include a screwdriver set, Allen wrenches, and any other tools specified in your laser cutter’s manual.
Assembly and Hardware Installation
The first step in setting up your laser cutter is the physical assembly and hardware installation. This usually involves mounting the laser module onto the printer’s frame, connecting it to the control board, and ensuring all components are securely in place. Carefully follow the manufacturer’s instructions for your specific laser module and 3D printer. Pay close attention to the wiring diagrams to ensure all connections are correctly made. Secure the laser module to the 3D printer’s frame using the provided screws or mounting hardware. Align the laser module correctly to ensure it’s perpendicular to the cutting surface. Ensure that all screws are tightened sufficiently to prevent movement during operation.
Connecting the Laser Module
Once the laser module is physically mounted, you’ll need to connect it to the control board. This typically involves plugging the laser module’s power and control wires into the appropriate ports on the control board. The control board then receives signals from the software and activates the laser. Double-check the wiring connections to ensure they match the diagrams provided in your laser cutter’s manual. Incorrect wiring can damage the laser module or the control board. After connecting the wires, secure them with cable ties or other methods to prevent them from getting tangled or disconnected during operation. It is essential to ground the laser cutter to reduce the risk of electrical shock and to improve the machine’s performance.
Software Installation and Configuration

Once the hardware is set up, you need to install and configure the necessary software. The most commonly used software for the Tevo Tarantula laser cutter is LaserGRBL, a free and open-source software. This software allows you to control the laser, load your designs, and adjust the cutting parameters. Before you begin, ensure that you have downloaded the correct version of LaserGRBL from a reputable source. Follow the software’s installation instructions to install it on your computer. After installation, you’ll need to configure the software to work with your specific laser module and control board. Pay close attention to the settings, such as the laser’s power, speed, and the working area dimensions.
Installing LaserGRBL
LaserGRBL is the most popular choice for controlling the Tevo Tarantula laser cutter. The installation process is straightforward. Download the latest version of LaserGRBL from a trusted source. Run the installer, and follow the on-screen instructions. During installation, you may be prompted to install additional drivers, such as the USB driver for the control board. Ensure these drivers are installed correctly to allow communication between your computer and the laser cutter. After installation, open LaserGRBL to verify that it is working correctly.
Configuring Laser Settings
After installing LaserGRBL, you will need to configure the laser settings to match your hardware. In LaserGRBL, you can find the settings menu, usually located under the “Settings” tab. Here, you can adjust the laser power, speed, and other parameters. Start by selecting the correct COM port that your laser cutter is connected to. Set the laser power based on the material you will be cutting or engraving. Start with low power settings and gradually increase until you achieve the desired result. It’s also critical to set the correct working area size in LaserGRBL to match the dimensions of your Tevo Tarantula laser cutter. Misconfigured settings can lead to poor cutting results or even damage to your machine or material.
Operating Your Tevo Tarantula Laser Cutter

Once your hardware and software are configured, you can start operating your Tevo Tarantula laser cutter. This process involves preparing your design, loading it into LaserGRBL, and initiating the cutting or engraving process. Safety is paramount when operating a laser cutter. Always wear appropriate safety glasses designed to protect your eyes from laser radiation. Ensure that the area around the laser cutter is well-ventilated to remove any fumes generated during cutting. Never leave the laser cutter unattended while it is operating. Familiarize yourself with the emergency stop button and other safety features on your machine.
Preparing Your Design
Before you can cut or engrave anything, you need to prepare your design. You can create designs using various software such as Inkscape (free and open-source) or Adobe Illustrator (paid). When creating your design, ensure it is in a format that LaserGRBL can import, such as SVG. When designing, consider the material you’ll be using, as different materials require different settings. Make sure your design is scaled correctly to fit your material. The design should be vectorized, meaning it uses lines and curves, which the laser cutter will follow. Remove any overlapping lines or objects that can affect cutting quality. Make sure to set up different layers for cutting and engraving, which will make it easier to adjust the settings later.
Loading Your Design into LaserGRBL
Once your design is ready, you can load it into LaserGRBL. Open LaserGRBL and click the “Open” button or drag and drop your design file into the software. Once the design is loaded, you may need to adjust its size or position within the software. Make sure the design fits within your laser cutter’s working area. In LaserGRBL, you can preview the design and the paths the laser will follow. This preview allows you to check for any issues or errors before starting the cutting process. You can also adjust the cutting parameters, such as speed and power, for different parts of your design. Review all settings carefully before proceeding.
Initiating the Cutting Process

After loading your design and configuring the settings, you’re ready to start cutting. Place the material you want to cut or engrave into your laser cutter. Ensure the material is flat and securely positioned within the working area. Double-check that your safety glasses are on and that the area is well-ventilated. In LaserGRBL, click the “Play” button to start the cutting or engraving process. Monitor the process closely for the first few minutes to ensure everything is operating as expected. Depending on the material and design complexity, the cutting process can take anywhere from a few minutes to several hours. Once the process is complete, turn off the laser cutter and carefully remove the finished product. Use caution when handling the material, as it may be hot.
Safety Precautions While Cutting
Safety is the most important aspect of operating a laser cutter. Laser cutters produce intense beams of light that can cause serious injury if not handled properly. Always wear the appropriate safety glasses designed to protect your eyes from laser radiation. Ensure that the laser cutter is placed in a well-ventilated area to remove harmful fumes produced during cutting. Never leave the laser cutter unattended while it is in operation. Keep flammable materials away from the laser cutter. Have a fire extinguisher nearby and know how to use it. Be aware of the materials you are cutting, as some materials release toxic fumes. Before each use, inspect the laser cutter and its components for any signs of damage. Follow the manufacturer’s safety guidelines and instructions.
Material Compatibility and Settings
Understanding material compatibility and settings is crucial for successful laser cutting and engraving. Different materials react differently to laser light, and the settings you use need to be adjusted accordingly. Incorrect settings can result in poor cutting quality, fire hazards, or damage to your laser cutter. Always research the best settings for the material you are using before starting your project. Start with low power settings and gradually increase them until you achieve the desired results. Document your settings for future reference. It is also important to know which materials are safe to laser cut and which are not.
Choosing the Right Materials
The Tevo Tarantula laser cutter can cut and engrave a variety of materials. Common materials include wood, acrylic, paper, and some types of fabrics. Before you start, make sure the material is safe for laser cutting. Some materials are not suitable for laser cutting, as they can produce toxic fumes or catch fire. Avoid cutting PVC, vinyl, and other materials that contain chlorine, as they release harmful gases. Always research the material you are using to ensure it is compatible with your laser cutter. Test new materials on a small scale before starting a larger project. Consider the thickness and composition of the material when selecting it.
Adjusting Power and Speed Settings
Adjusting the power and speed settings is critical to achieving the desired results. The power setting controls the intensity of the laser beam, while the speed setting controls how fast the laser moves across the material. For cutting, you generally want to use higher power and slower speeds. For engraving, you may want to use lower power and faster speeds. The optimal settings depend on the material’s thickness and type. Start with the manufacturer’s recommendations or online guides and fine-tune the settings based on your tests. Make small adjustments and test again until you achieve the desired result. Keep a record of your settings for future reference. Always prioritize safety and avoid excessive power settings to prevent fire hazards.
Troubleshooting Common Issues
Like any machine, the Tevo Tarantula laser cutter can encounter issues. Knowing how to troubleshoot common problems can save you time and frustration. Some common issues include the laser not firing, poor cutting quality, and software errors. Always refer to the manufacturer’s documentation and online forums for assistance. Before starting, always make sure that all connections are secure. Many issues can be resolved by checking the connections and settings. If you are experiencing persistent problems, do not hesitate to seek assistance from experienced users or technical support.
Laser Not Firing

If the laser is not firing, first check the power supply to ensure it is turned on and working correctly. Verify that the laser module is properly connected to the control board and that the wiring is secure. Check the settings in your software to ensure the laser power is turned up and the cutting process is initiated. Sometimes, the issue can be related to the control board or the laser module itself. Consult the manufacturer’s documentation or online forums for troubleshooting guides. It might be necessary to replace the laser module or the control board if the problem persists.
Poor Cutting Quality
If the cutting quality is poor, check the following things: the focus of the laser module, the laser power and speed settings, and the material you are using. Make sure the laser module is correctly focused on the material. Adjust the laser power and speed settings until you achieve clean cuts. Ensure the material is flat and securely positioned. If the issue persists, check the laser module’s lens for cleanliness and damage. Clean the lens regularly to maintain optimal performance. Check for any mechanical issues, such as loose belts or misalignment, which can affect cutting quality. Experiment with different settings and consult online guides for best practices.
Maintenance and Care for Longevity
Proper maintenance and care will extend the life of your Tevo Tarantula laser cutter and ensure it operates efficiently. Regular maintenance prevents many common issues and ensures optimal performance. Following a regular maintenance schedule is essential for keeping your laser cutter in good condition. Remember, a well-maintained machine will provide better results and last longer. Take the time to inspect your machine regularly and address any problems promptly.
Here are some important tips for maintaining your laser cutter:
- Clean the lens of the laser module regularly, as dust and debris can affect performance.
- Check the frame and structure for loose screws or misalignments, and tighten or adjust them as needed.
- Keep the machine clean, removing dust and debris after each use.
- Inspect the belts and moving parts for wear and tear, and replace them if necessary.
- Ensure proper ventilation to remove fumes generated during cutting.
- Store the laser cutter in a dry, clean environment when not in use.
- Follow the manufacturer’s maintenance instructions.