What is a Tevo Tarantula Bed Sticker?
A Tevo Tarantula bed sticker is a crucial component in 3D printing, serving as the surface upon which your 3D prints adhere. It’s a specialized sheet applied to the heated bed of your 3D printer, providing a surface that allows the initial layers of your 3D prints to stick properly. Without a good bed sticker, prints are prone to warping, detachment during printing, and overall print failure. The sticker’s primary function is to improve the adhesion of the first layer, which is essential for a successful print. They are typically made from various materials designed to withstand the heat from the printer’s heated bed and provide a suitable surface for different types of filaments.
Importance of a Bed Sticker
The significance of a bed sticker cannot be overstated in the world of 3D printing. A well-chosen and properly applied bed sticker significantly enhances the success rate of your prints. It promotes adhesion, ensuring that the initial layers of your 3D model stick firmly to the print bed. Without proper adhesion, prints can detach, leading to wasted filament and time. Bed stickers also protect the printer’s bed from damage caused by direct contact with the hot nozzle or removal tools. Furthermore, different types of bed stickers are designed to work well with specific types of filament, helping you achieve optimal print results. Choosing the right bed sticker and maintaining it properly can drastically improve your 3D printing experience.
Types of Bed Stickers for Tevo Tarantula
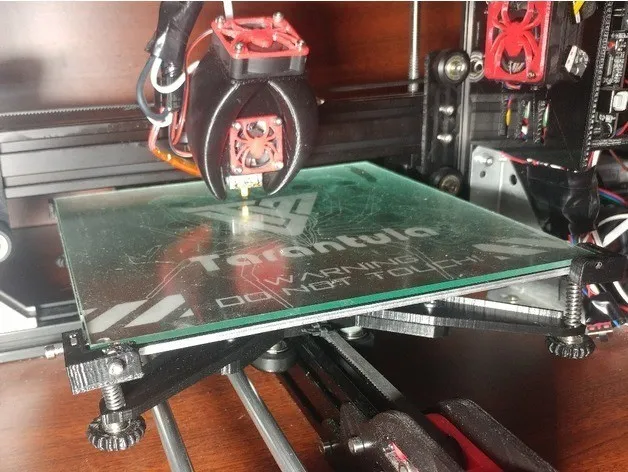
Several types of bed stickers are available for the Tevo Tarantula, each with its unique benefits. Selecting the right one depends on your printing needs, the types of filaments you use, and your preferences for ease of use and maintenance. Consider the following common options to find the most suitable bed sticker for your Tevo Tarantula.
PEI Sheet
PEI (Polyetherimide) sheets are a popular choice for 3D printing beds due to their excellent adhesion properties and durability. These sheets are known for their ability to bond well with a wide range of filaments, including PLA, ABS, PETG, and TPU. PEI sheets offer a smooth printing surface, and prints generally adhere well during printing and release easily once the bed cools. They are also very durable and can withstand multiple print cycles. PEI sheets are relatively easy to clean and maintain, making them a cost-effective option for frequent 3D printing. Proper bed leveling and initial Z-offset calibration are important when using a PEI sheet for optimal results.
Glass Bed
Glass beds are another commonly used option. They provide a smooth, flat surface that results in a very clean and aesthetically pleasing first layer. Glass beds are often used with a bed adhesive like glue stick or hairspray to help with adhesion, especially for filaments like ABS. One advantage of using a glass bed is that the bottom surface of your prints comes out very smooth. While glass is durable, it can be more prone to damage if the print detaches forcefully or if the nozzle impacts the bed. The bed usually needs to be prepped with an adhesive. Glass beds need to be handled with care and can sometimes require more effort to remove prints.
BuildTak
BuildTak is a specialized bed surface that offers excellent adhesion properties across a wide range of filaments. It is a flexible, durable sheet designed to create a strong bond between the print and the bed. BuildTak is known for its ease of use; prints usually adhere well during the printing process and can be removed without excessive force. BuildTak sheets are a user-friendly option because they often don’t require additional adhesives. They also provide a good balance of adhesion and ease of release. BuildTak sheets are a popular choice for those seeking a reliable and straightforward solution to bed adhesion problems.
Choosing the Right Bed Sticker
Selecting the optimal bed sticker for your Tevo Tarantula depends on several factors. Understanding these considerations will help you make an informed decision that aligns with your printing requirements and preferences. Evaluate your needs to determine the best type of bed sticker for your 3D printing projects.
Considerations Before Choosing
Before selecting a bed sticker, consider the types of filaments you frequently use. Different filaments require different bed surfaces to achieve optimal adhesion. Also, consider ease of use and maintenance. Some stickers require specific preparation steps before printing, while others are relatively straightforward. Determine how much effort you are willing to put into bed preparation. Finally, consider the long-term cost. Some bed surfaces are more durable than others and will last longer, making them more cost-effective in the long run.
Print Material Compatibility
Ensure the bed sticker is compatible with the filaments you plan to use. For example, PEI sheets are versatile and work well with PLA, ABS, PETG, and TPU. Glass beds often require an adhesive for ABS. BuildTak is designed to work with various materials. Research the compatibility of the bed sticker with each filament you use to ensure the best adhesion and print quality. Refer to the manufacturer’s recommendations to find the best bed sticker for each filament.
Ease of Use and Removal
Consider how easy it is to apply the sticker to the bed and remove prints once they are finished. Some stickers are easier to apply than others. Some bed surfaces, like PEI sheets, allow prints to be removed when cooled. If you prefer a simpler setup and removal process, look for bed stickers that require minimal preparation and provide easy print removal. Think about how much effort you want to put into bed preparation and print removal when choosing a bed sticker.
How to Apply a Bed Sticker on Your Tevo Tarantula
Applying a bed sticker correctly is essential for achieving good print adhesion. Proper application prevents issues like bubbles and ensures a smooth, level surface. Following these steps carefully will help you achieve successful prints on your Tevo Tarantula.
Preparing the Bed Surface
Before applying the sticker, thoroughly clean the heated bed of your Tevo Tarantula. Remove any residue from previous prints, dust, or oil. Use isopropyl alcohol (IPA) to clean the bed surface and ensure it is free of contaminants. The cleaner the surface, the better the sticker will adhere. Ensure the bed is cool and dry before applying the sticker. This preparation ensures a strong bond and reduces the risk of bubbles forming during application. Proper preparation is a crucial first step for successful application.
Applying the Sticker Smoothly
Carefully align the bed sticker with the edges of the heated bed. Slowly peel off the backing and apply the sticker to the bed surface, working from one edge to the other. Use a smooth tool, such as a credit card or a specialized applicator, to press the sticker onto the bed, ensuring there are no bubbles or wrinkles. Take your time to ensure the sticker is evenly applied to the entire surface. The application process is important for ensuring a smooth and level printing surface.
Tips for Avoiding Bubbles
Bubbles can lead to uneven printing surfaces and adhesion problems. To avoid them, apply the sticker slowly and use a smooth tool to press out any air pockets. Start from one edge and work your way across. If you see any bubbles, gently lift the sticker and reapply it, taking care to smooth out the air pockets. You can also use a pin to poke small bubbles and flatten the surface. Taking these precautions during application can prevent print defects later on.
First Print and Calibration
After applying the bed sticker, it’s time to calibrate your printer to ensure the first layer adheres correctly. Proper calibration is essential for good print quality and successful prints.
Adjusting Z-Offset
The Z-offset is the distance between your printer’s nozzle and the bed. Calibrating the Z-offset correctly is crucial for achieving the right first layer height. Too close, and the nozzle will scratch the bed or cause filament to clog. Too far, and the filament won’t adhere. Use your printer’s control panel to adjust the Z-offset during your first print to ensure the filament is properly squished onto the bed. Fine-tune the Z-offset until you achieve the correct first-layer adhesion.
Leveling the Bed
Bed leveling ensures the distance between the nozzle and the bed is consistent across the entire print surface. Use your printer’s leveling procedure to adjust the bed height at each corner. Ensure the nozzle is the correct distance from the bed. You can use a piece of paper to check the nozzle height; it should provide a slight resistance as you move it under the nozzle. Leveling the bed is important for making the first layer adhere properly and ensuring that the print is even across the surface.
Troubleshooting Bed Adhesion Issues
Despite your best efforts, you might encounter bed adhesion problems. Troubleshooting these issues is a common part of 3D printing. The following points cover common issues and solutions.
Common Problems and Solutions
If your print isn’t sticking, first check your bed level and Z-offset. Make sure the bed is properly leveled and that the nozzle is at the correct height. Clean your bed with IPA to remove any oils or residue. Ensure your bed temperature is correct for the filament type you are using. For PLA, a bed temperature of around 60°C is typical. For ABS, the bed temperature might be around 100-110°C. Increasing the first layer temperature and slowing down the first layer print speed can help with adhesion. Also, using an adhesive like glue stick or hairspray can improve adhesion, especially with glass beds. Ensure you have a clean surface before each print.
Cleaning the Bed
Regular cleaning is essential for maintaining the adhesion properties of your bed sticker and ensuring the longevity of the surface. Cleaning also helps prevent print failures.
Cleaning After Printing
After each print, remove any remaining filament residue from the bed. Once the bed cools down, gently remove any plastic scraps with a scraper or spatula. Wipe the bed down with IPA to remove any oils, fingerprints, or leftover adhesives. For tougher residue, consider using a specialized bed cleaner. Regular cleaning is crucial for preventing buildup and ensuring good adhesion for your next print.
Maintaining Your Bed Sticker
Proper maintenance of your bed sticker is crucial for extending its lifespan and ensuring consistently good print results. Following these maintenance tips will help you get the most out of your bed sticker.
Replacing Your Bed Sticker
Bed stickers don’t last forever and will need to be replaced over time. Knowing when to replace it will help to ensure you don’t have print failures. The life of a bed sticker depends on the type of sticker, the filaments you use, and how often you print. Check for signs of wear such as scratches, gouges, or a loss of adhesion. If you notice these signs, it’s time to replace your bed sticker. Regular inspection will help you identify when to replace it before print quality declines.
When to Replace
Look for signs of wear such as scratches, peeling, or a loss of adhesion. If prints start failing or if you’re finding it difficult to get good adhesion, it might be time for a new bed sticker. If the surface is damaged, it can affect the bottom surface quality of your prints. If the bed sticker is showing wear, or after a specific amount of time, depending on usage, it’s time to replace it.
Removing the Old Sticker
Carefully remove the old bed sticker. The method depends on the type of sticker. Some stickers can be peeled off easily. If the sticker is difficult to remove, heat the bed slightly to soften the adhesive and make it easier to remove. Use a scraper or spatula to lift the edges and slowly peel it off. Clean any remaining adhesive residue with IPA or a specialized adhesive remover before applying the new sticker. Proper removal is an important step in ensuring that the new sticker adheres properly.
