What You’ll Need Origami Tarantula
Creating an origami tarantula is a fun and engaging activity that requires only a few essential materials. The most important item you’ll need is paper. Choose square origami paper or any thin paper that can hold a crease well. Origami paper specifically designed for this craft is ideal because it comes in various colors and sizes, adding visual interest to your tarantula. Beyond the paper, you might find a few other items helpful. A pair of small scissors can be useful for precise cuts, especially if you want to add intricate details or customize your spider’s appearance. A bone folder or a similar tool can help create sharp, clean folds, enhancing the final look of your origami creation. Finally, a flat surface to work on is essential for accurate folding. A table or a clean, smooth desk provides the perfect base to keep your folds precise and prevent the paper from tearing.
Paper Selection Origami Tarantula
The paper you select will significantly influence the final look and feel of your origami tarantula. Origami paper is specifically designed for this purpose, making it an excellent choice. It’s typically square, thin, and available in a wide variety of colors and patterns, which allows you to bring a unique look to your tarantula. If you don’t have origami paper, consider using other types of thin paper. Printer paper can work, but it might not hold the creases as well. Magazine pages can offer interesting patterns but can be challenging to fold due to the glossy finish. The size of the paper is another critical consideration. Larger paper will make a larger tarantula, making the folding easier for beginners, while smaller paper will create a more intricate and detailed model. Experiment with different sizes to find the perfect balance between ease of folding and desired size. The weight of the paper is also important; thinner paper is easier to fold but can be less durable, while thicker paper will hold the folds better but might be more difficult to manage.
Preparing the Paper Origami Tarantula

Before you start folding your origami tarantula, it’s essential to prepare your paper. Start by ensuring your paper is a perfect square. If you’re not using pre-cut origami paper, you may need to trim any excess edges to achieve this shape. This step is crucial because precise folds depend on starting with a perfect square. Next, fold the paper diagonally from corner to corner, creating a crease down the middle. Unfold it and repeat this process on the other diagonal. These creases will serve as guide points for future folds, so make sure they are crisp and well-defined. Now, fold the paper in half, bringing two opposite edges together to create a vertical crease. Unfold and repeat with the other two edges to create a horizontal crease. These creases divide the paper into four equal parts and help you position the tarantula’s body and legs accurately. With these preparatory steps complete, your paper is now ready for the more complex folds that will bring your origami tarantula to life.
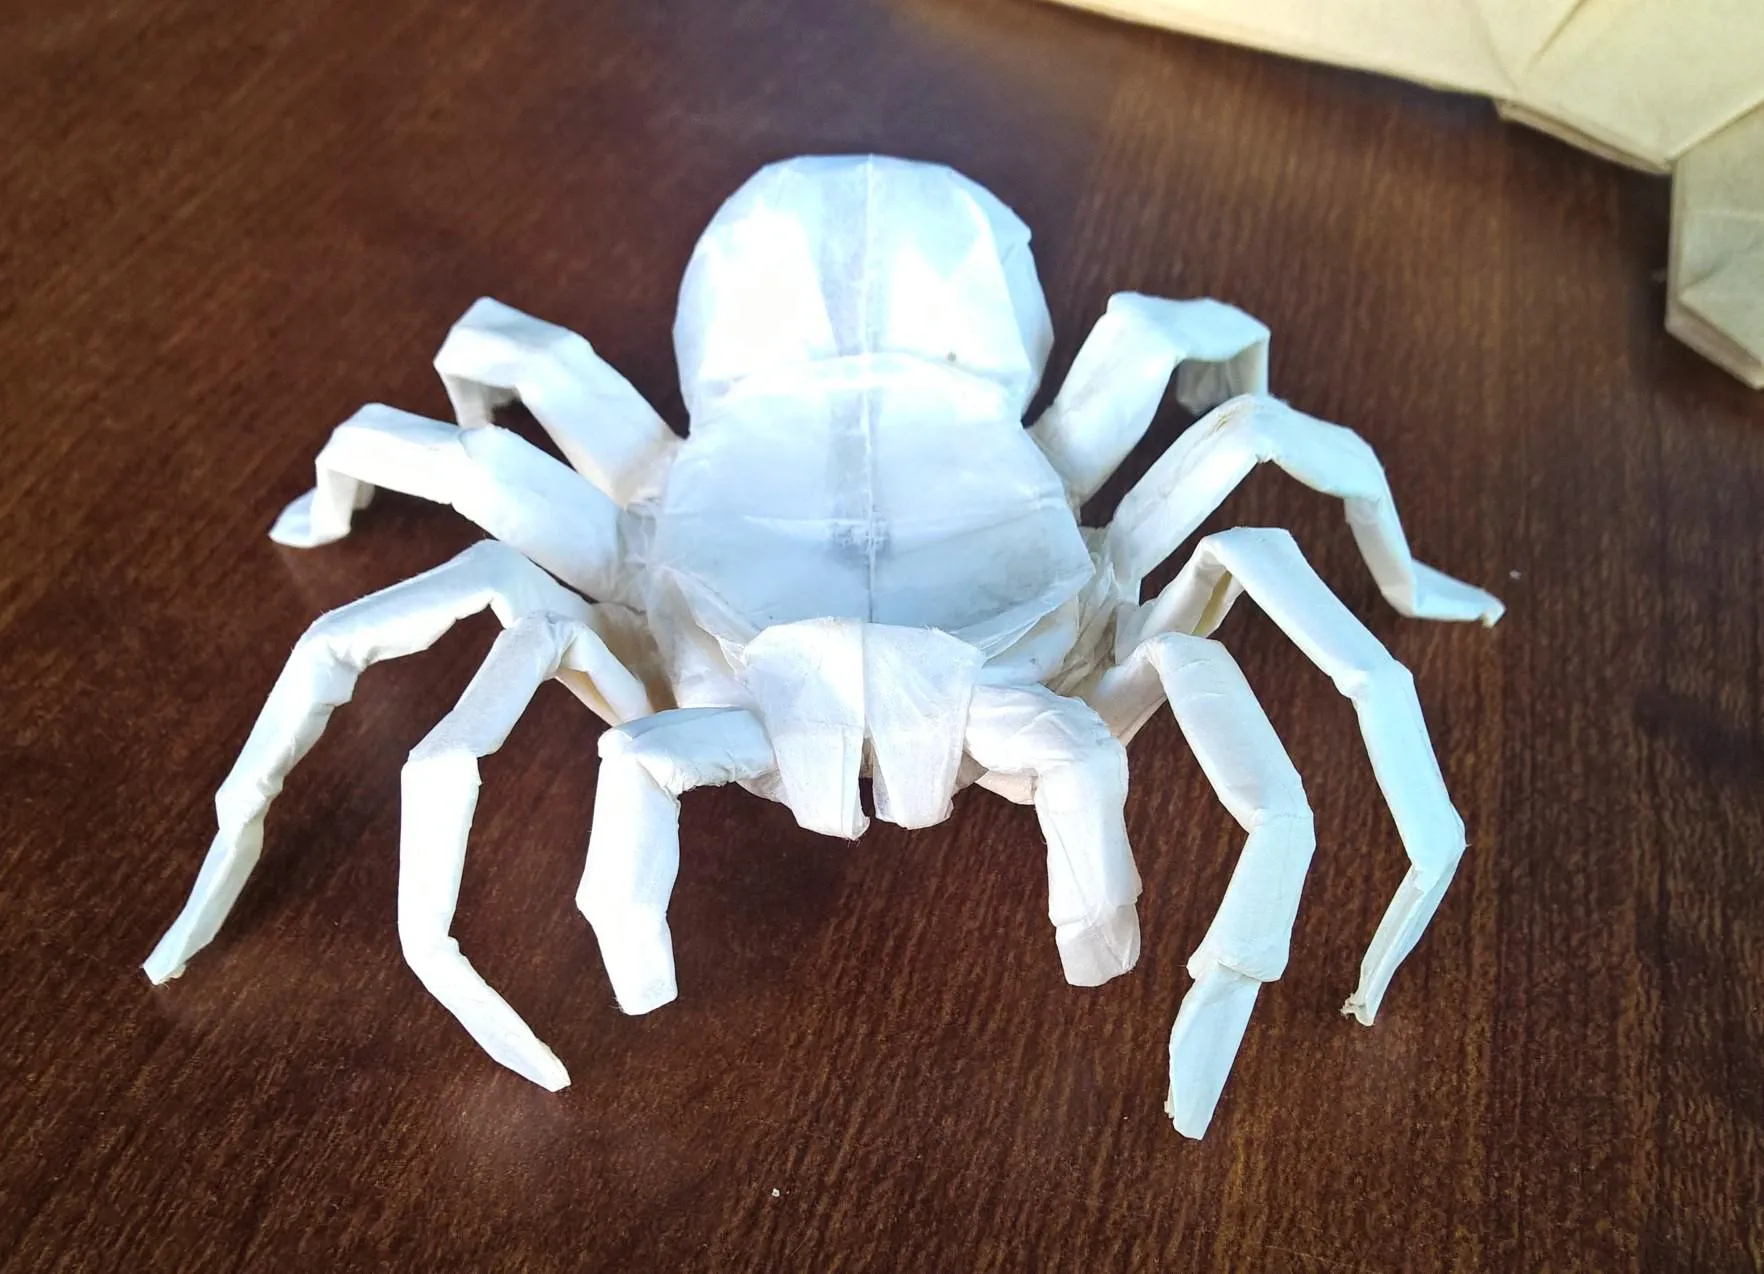
Folding the Legs Origami Tarantula
The legs are a defining feature of any tarantula, and creating them effectively is crucial for your origami model. Start by folding the paper to create the basic shape for the legs. Using the creases you made earlier, fold the paper inward to form a kite shape. This process will create the foundation for the tarantula’s body and the initial folds for the legs. Next, you’ll need to create the individual legs. There are several techniques you can use, depending on the complexity you desire. One simple method is to fold the edges of the paper towards the center crease, creating thin, elongated structures. Another method involves using a series of folds to create a more realistic, segmented leg appearance. Experiment with different folds to see which technique produces the results you prefer. After folding the legs, pay attention to their positioning. Ensure that the legs are evenly spaced around the body, creating a balanced and stable structure. Adjust the folds as necessary to achieve the desired pose. The legs can be positioned to appear as though the tarantula is crawling or standing, adding to the realism of your creation. Remember that the finer details will make your origami more attractive. Be patient, and consider using tools like a bone folder to make sharp, crisp lines for best results.
Creating the Body Origami Tarantula
Creating the body of your origami tarantula involves several key folds that will bring its form to life. Start by folding the top and bottom points of the kite shape towards the center. This will define the main body structure, and by adjusting these folds, you can control the size and shape of the body. The next step involves folding the body sections to shape the cephalothorax and abdomen. You can create a rounded abdomen by folding the bottom part up and then slightly tucking it in. Similarly, you can shape the cephalothorax by adjusting the top section, making it slightly wider to distinguish it from the abdomen. Pay close attention to the symmetry of your folds; symmetrical shapes make the tarantula look more realistic and balanced. If you want to enhance the body’s shape, consider making additional folds to give it a more three-dimensional appearance. For example, folding the sides of the body inwards can create a more defined abdomen and a narrower cephalothorax. At this stage, the adjustments you make will significantly impact the overall look of your tarantula, so take your time and experiment with different folding techniques to achieve the desired result.
Adding Details Origami Tarantula

Adding details to your origami tarantula will elevate it from a simple paper model to a lifelike creation. One of the easiest ways to add detail is by using a marker or pen to draw eyes. The placement of the eyes on the cephalothorax can significantly impact the spider’s expression, so experiment with different placements to create the desired look. Another detail you can add is a pair of fangs. These can be drawn directly onto the paper or created using small, separate pieces of folded paper and then glued onto the cephalothorax. The legs can also be enhanced with detail. Consider drawing small markings or patterns on the legs to mimic the intricate patterns found on real tarantulas. For an even more realistic touch, you can also cut or fold the legs to add a textured appearance, which provides definition. Finally, consider adding other small details. This might include small hairs or even a small ‘pedipalps’ or mouth parts. These seemingly minor additions can significantly enhance the overall appearance and realism of your origami spider. Take your time to make these details precise, as they are essential for the final look.
Finishing Touches Origami Tarantula
Once you’ve finished folding and adding details, it’s time for the finishing touches. These are the steps that will bring your origami tarantula to its final, polished form. If your tarantula is not standing properly, carefully adjust the positioning of the legs until it stands steadily. Ensure that the legs are evenly spaced and provide enough support. You can gently bend the legs to adjust their pose and balance the model. Check all the folds to ensure they are crisp and well-defined, and smooth any areas that may need adjustment. If you used any glue or adhesive to add details, make sure it is dry before handling your tarantula further. Finally, take a moment to admire your creation. You can display your origami tarantula on a shelf, use it as a decoration, or give it as a unique gift. To protect your origami, you can coat it with a sealant or place it in a display case. The finishing touches bring everything together, turning a collection of folds into a captivating piece of art.
Tips for Origami Tarantula Success
To ensure your origami tarantula is a success, keep a few tips in mind. Firstly, practice makes perfect. Don’t be discouraged if your first attempt isn’t perfect. The more you fold, the better you’ll become at it. Watch video tutorials or follow step-by-step instructions carefully, and take it slowly, especially when learning new techniques. Ensure your folds are accurate and crisp. A bone folder or a similar tool is helpful in this regard, as it allows you to create well-defined lines. Use high-quality paper to get the best results. Origami paper is designed specifically for folding, so it is the best choice. Experiment with different paper sizes and colors to create a tarantula that is unique. Take your time, and don’t rush the process. Folding origami is a relaxing activity, so enjoy the process. Finally, don’t be afraid to experiment and get creative. Add your personal touch to the design by adding details, patterns, or modifications. This is the key to making your origami tarantula stand out from the rest. Have fun, and enjoy the craft!
Troubleshooting Common Issues Origami Tarantula

Even experienced origami artists encounter issues from time to time. Here are some of the common problems you might face when folding an origami tarantula and how to fix them. If the legs of your tarantula are not stable or the spider doesn’t stand on its feet, carefully adjust the leg positions. The center of gravity plays a huge role; make sure the legs are spread out evenly and that they are long enough to provide the correct support. If the folds are not crisp, which makes the tarantula look imperfect, make sure your folds are clean. Use a bone folder or a similar tool to press down and create sharp, well-defined creases. If the body shape isn’t symmetrical, or doesn’t have the desired shape, examine the previous folds to identify where the mistake occurred. Re-fold those sections carefully to maintain symmetry. If you accidentally tear the paper, carefully patch it using glue and let it dry before proceeding. If your origami spider has a rough appearance, and you used standard paper, consider using thinner paper that holds the crease. Finally, if you are not satisfied with any specific part, try a different approach and make adjustments as needed. Remember that even if you make mistakes, each attempt helps to gain experience and makes you better.